Getting Started - From Zero To Basic App
Introduction
This guide will walk you through the steps of building an app using the Zapp platform. The guide will go over all the needed steps to create a debug version of your app. This guide will not go into details. If you want to learn more on a specific subject, search for it on the site's search.
The main purpose of this guide is get you up and running with a debug version on a real device. This guide will cover the following:
- Create the first version of your app inside a release.
- Create a layout to be able to customize the look and feel of your app.
- Build a debug (testing) version and download it to your device
- See the changes you are making to the layout transmitted directly into your app (without the need to rebuild).
- Add manual feeds to add content to your app.
- Add components to present your content on the app.
- Get a list of common next steps to further customize and tweak your app to your business needs.
This guide will walk you through building a Quick Brick app with a Layouts V2 Layout.
Prerequisites
It's highly recommended that you have a device in hand to see and test you creation.
If you want to find out more about a specific term that is being used in this guide, please refer to the Terminology Section.
Step 1 - Create a Release
Once you logged into Zapp - you'll see a card with your App family name and logo.
Clicking it will redirect you to the Releases screen.
Decide which platform you would like to start building for (iOS, Mobile Android, Apple TV, Android Tv, Amazon Fire, Roku, Samsung TV, LG TV):
- Click on the
New Releasebutton. - Give your release a meaningful name.
- Pick your platform (for new apps always choose the Quick Brick version).
- Leave the status in
scoping.
Step 2 - Create your first version
Go back to you release page (click on you app family name on the top left)
Choose your release.
Click on the New Version button and create your first version.
You have an option for creating an a version from scratch or to use an existing version as a starting point.
Because we didn't create any versions yet, choose the Create Blank option.
Fill out the following information:
- Your app Name (this will appear on the end user's device) - Make sure the name does not include special characters or symbols.
- Your app version - if you don't know what to put here - write
0.1. Keep in mind that anytime you create a new version on the same platform you'll need to give it a different version number (e.g. on the next time you create a version you won't be able to use0.1use0.2an so on). - Choose your target device according to your needs.
- Choose the latest stable SDK for the SDK version select box.
- Make sure The
Quick Brickcheckbox is checked - Make sure that the
Quick Brick versionis set toUse SDK Default - In the URL scheme choose a URL scheme protocol that will be assigned to your app. If you don't know what to put - write your app name without spaces using lowercase (English) letters.
- For the active layout choose the layout name you created before.
- Click the
Createbutton.
Step 3 - Create an empty Layout
Once your release was created, create for it a layout.
- Click on the
Studiobutton. - Click on the
Add Layoutbutton. - Give your layout a name.
- Give your layout a target (choose a target that corresponds to the Release you just created).
- Check the
Use Layouts V2switch.
Create a default cell style
- Click on the
Cell Stylestab. - Click on the
New Cell Stylebutton. - Pick
Cell 1 Mobile(for TV pickCell 1 TV). - Click on the
Savebutton.
Step 4 - Build a debug version
If you just finished the steps above, your version is now being created - it may take a few minutes
till it's ready.
Once your version is ready you'll see a green play button (The Build Button) on the right of the version row.
You can now build your app for debug:
- Click on the
Build Button- the build dialog will pop up. - If you got any warnings about required plugin updates click on the
Plugin Gallerybutton and follow the instructions on how to update your plugins. Once done, go back to your release and click again the green / orangeBuild Button(The warnings should disappear)
If you see an orange Build Button instead of a green one - this is just to let you know that a build is required for you latest updates to take an affect. You can safely click on the build button even if its orange.
- One you clicked on the build button - that app will start building. Building time can take a few minutes depending on the build queue and the platform you are building. You can click on the build spinner to get an estimated build time.
Step 5 - Download your debug version and see it on your device
Once your version was built successfully, you can download it to your device. Downloading the debug version app, depends on the platform you are trying to download:
-
For iOS & Android mobile click on the download icon and choose the debug version option. Scan the QR code with your device.
-
For Samsung & LG you have an option to see the app on your browser.
Although previewing the Samsung & LG Apps on the browser is very convenient, Once you get familiar with the Zapp platform, we recommend that you install and test on a real device.
On Android make sure you set your device to be able to open apps outside of the Google Play store.
On iOS make sure you approve Applicaster Provision profile on the general setting page to be able to download the app to your device.
-
Guide for downloading debug version for TVs is coming soon. In the meanwhile please consult your customer success representative.
-
Open you app on your device - You should be able to see your app's icon on the home screen of your device. Clicking on the icon should open an empty screen. This will be the canvas of your app. In the next steps we'll fill out the app with design and content without the need to rebuild it.
Step 6 - Create a manual feed
To get you more familiar with the Zapp platform capabilities, let's create a dummy content feed and show it on our app.
We'll create a list of 3 video dummy items:
Once you understand the basic of inserting content to your app - you'll be able to create more meaningful feeds manually, by hooking one of our exiting API or by integrating your own API to the mix.
- Go to your release page and click on the
Feedsdropdown. - Choose
Layouts v2 \ Feeds - Click on the
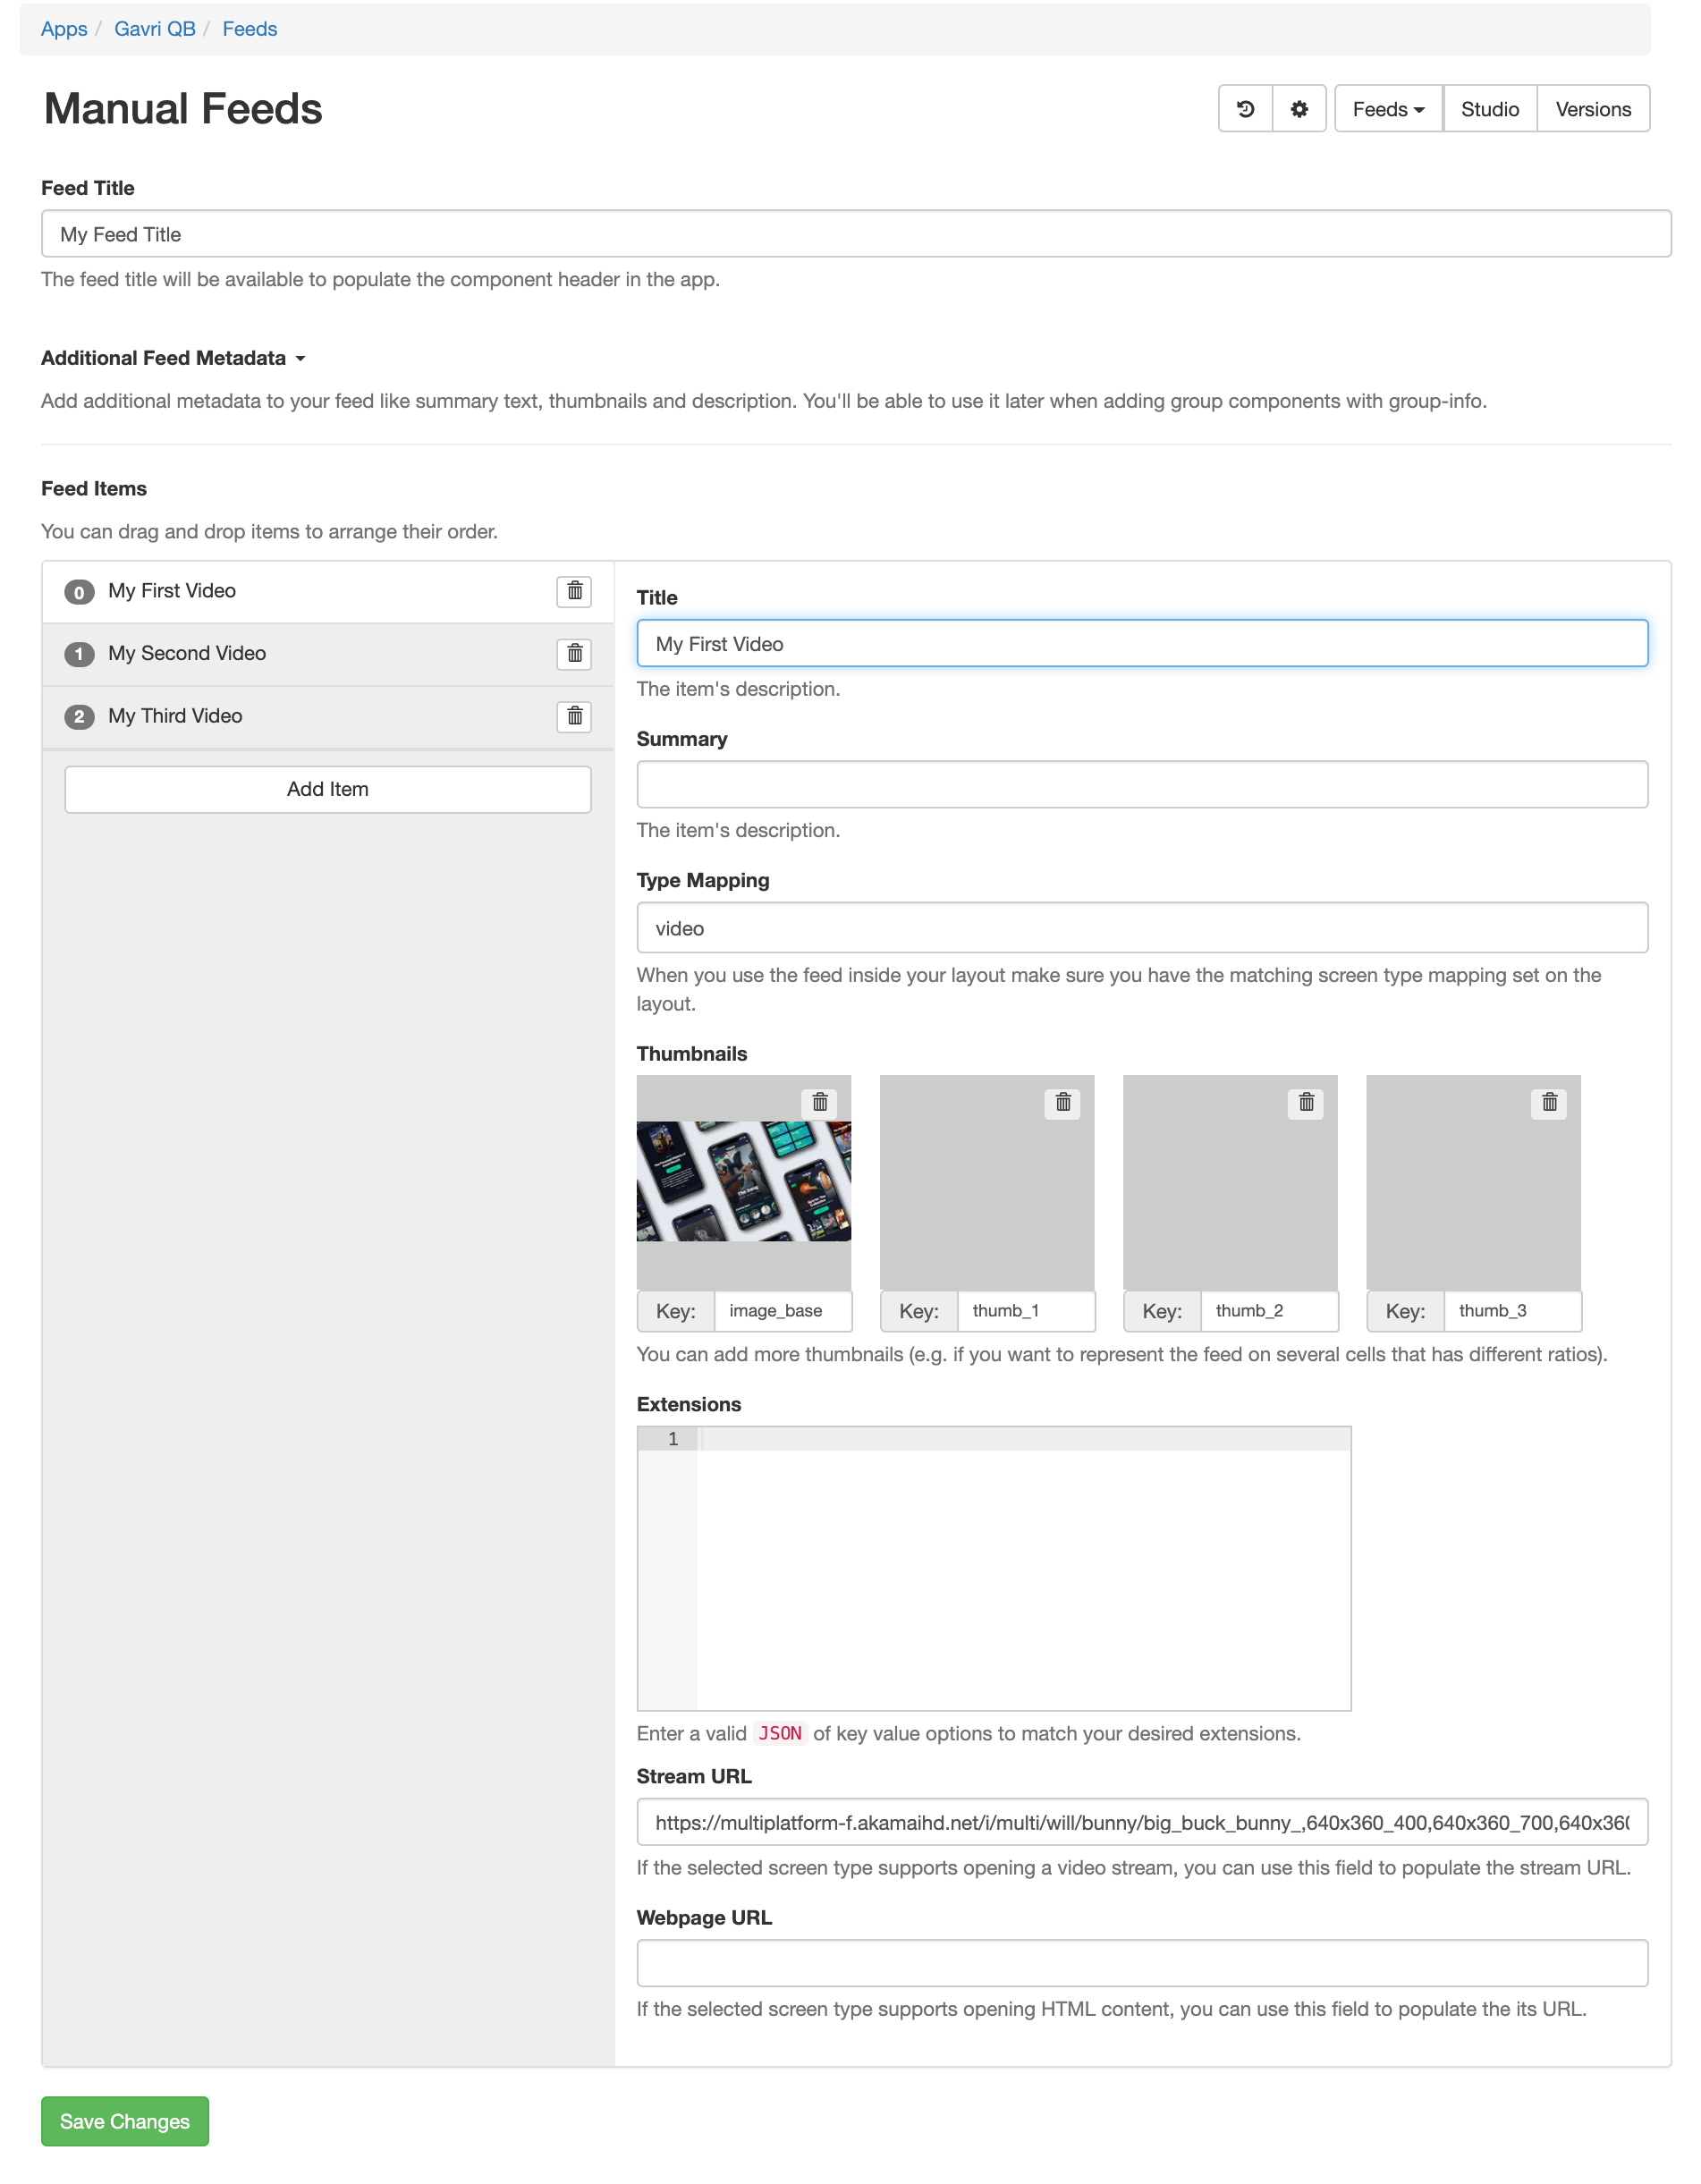
New Feedbutton and chooseManual Feeds - Set your feed a title and add 3 items
- Each of the items should have a title a type mapping set to
videoand an optional title - For the
Stream URLuse this dummy video link:https://multiplatform-f.akamaihd.net/i/multi/will/bunny/big_buck_bunny_,640x360_400,640x360_700,640x360_1000,950x540_1500,.f4v.csmil/master.m3u8or provide your own. - Save your feed.
Step 7 - Customize your layout
Go to the Studio section
(Studio button can be found both on the release and in the Feeds section).
Add your first component
- Choose the layout you created previously.
- Select the home screen
- Add a new component - choose for example the
List(QB)component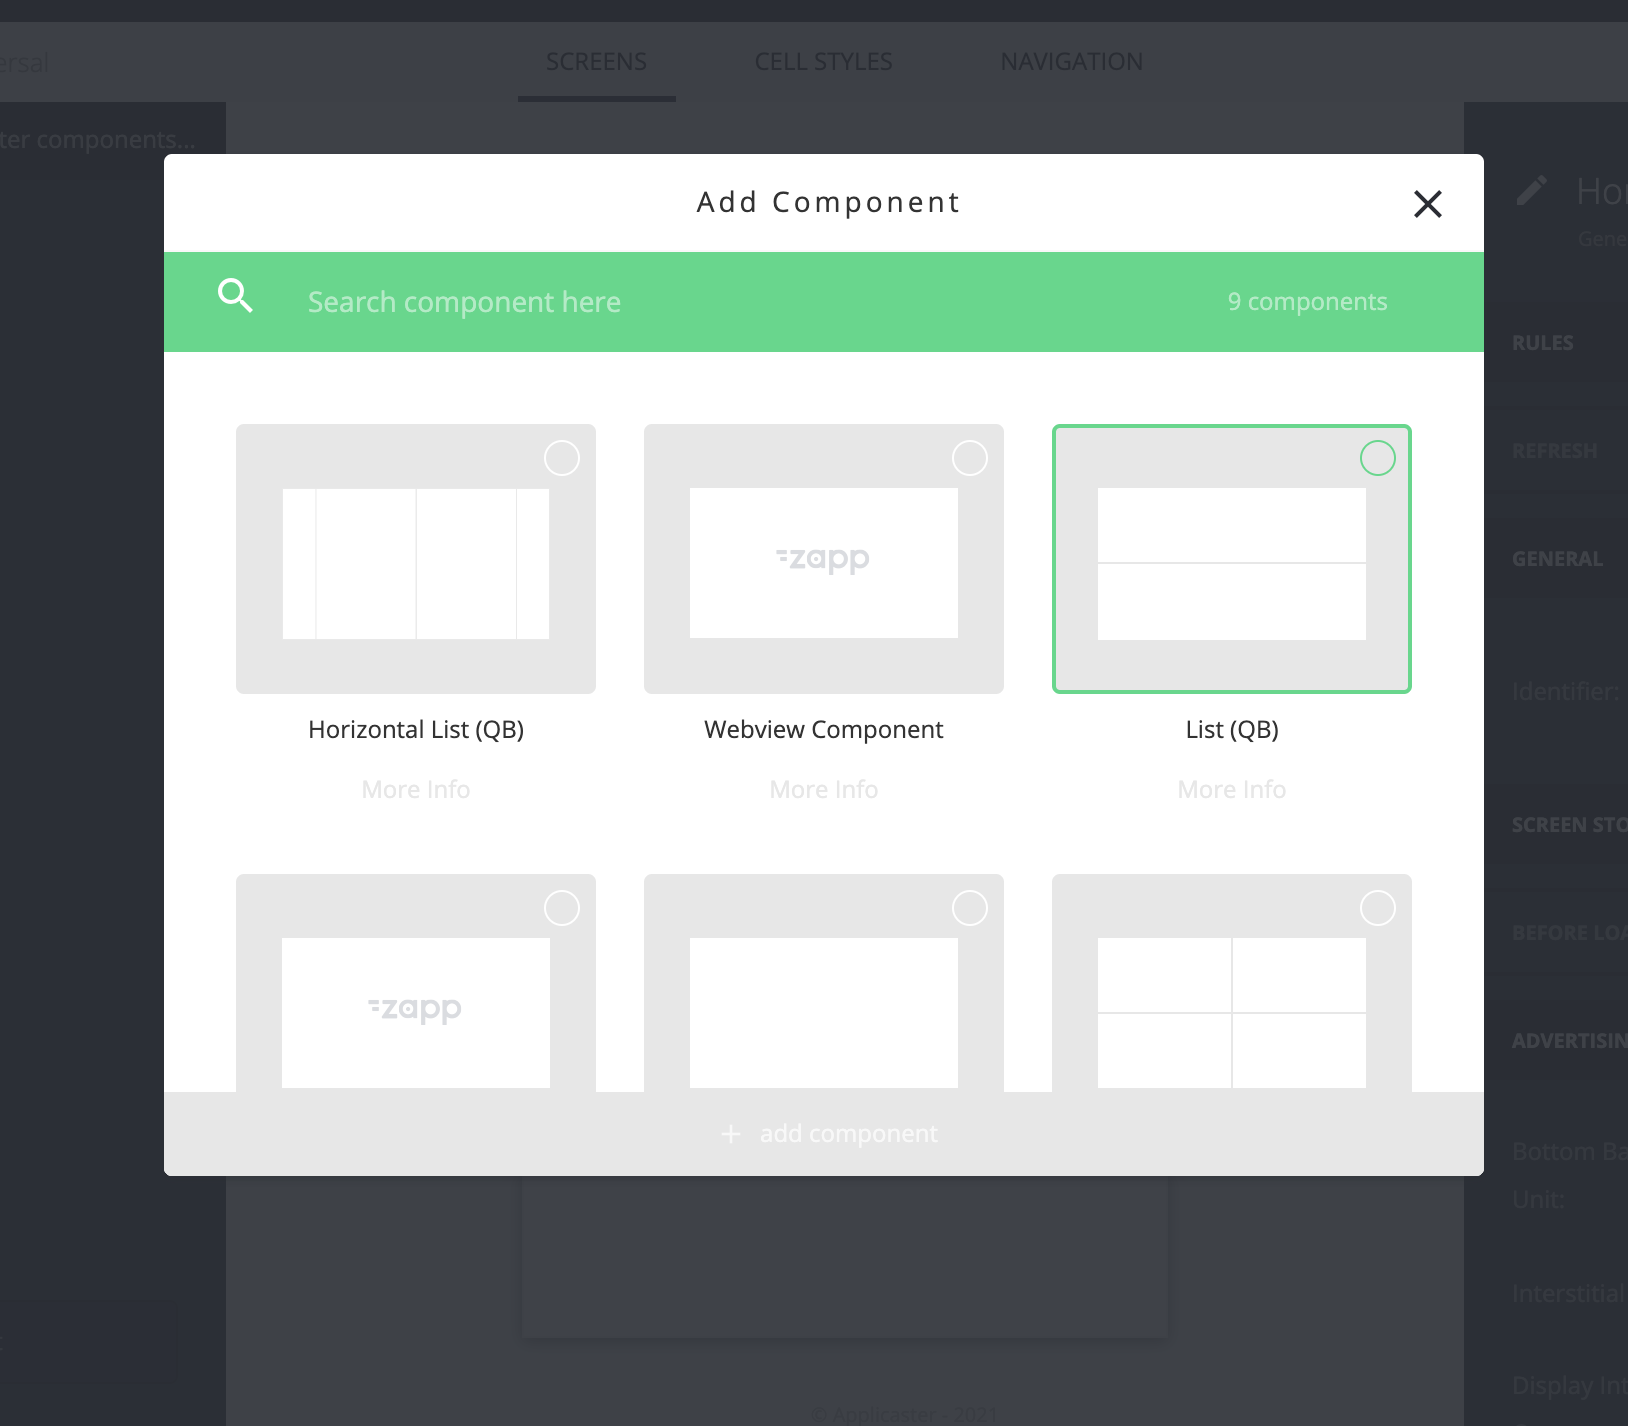
- Choose the
List(QB)you just added and configure it:- In the source section on the left panel choose the manual feed you created
- Scroll down the left panel and click the
Cell Styles-Selectbutton - Choose the cell you initially created when creating the layout.
- Click Save.
- Open the app - You'll now be able to see the feed you created on your app's home screen.
From now on any change you do on the layout's screens, navigation, and Cell Styles will be reflected on your app. To see the change you'll need to "Kill" the app and reopen it.
Add More screens & Navigation
Add More screens
You can add more screens to your layout by clicking the Add Screen button inside the Studio.
Once you click on the button you'll have an option to choose the kind of screen that you would
like to add.
On most cases you'll choose the General Content option - this will allow to to compose your
screens for components in the same manner you did with the home screen.
There are cases you might like to choose a different kind e.g. Web Page, Tabs Mini Player or even a custom screen your in-house development team created.
To find out more please search for the desired screen type in the docs or ask you customer success representative.
Once you pick the General Content screen you have an option to pick for a list of available and
highly customizable components e.g. Grid List, Hero, Web Component Group Component etc.
According to your pick, you can customize the component using the right side panel as you did for the List component on the home screen.
Add Screen to you main navigation
You can add the screens that you create to the root navigation of your app. By default both mobile apps and TV apps come with a top navbar. On mobile The navbar comes with a default side menu you can add screens to. You can change it if you desire to a bottom Tab bar.
- Go to the
NavigationTab inside theStudio. - On mobile, click on the
Side MenuOption - You can now add screens to the menu by clicking the
Add Itembutton and choosing theScreen Navigation Buttonoption.
Add Type mapping
A Layouts V2 Feature
You can set for each screen a type mapping.
A type mapping is a way to connect a specific screen to an entity on your business domain.
For example you might want to have all shows open on a specific screen layout called show, but you would like the option to open featured shows on a different screen layout. Using Type mapping you can give types/names to your screens and "tell" Zapp to open all shows in the show screen layout, but featured shows to be opened on the featured-show layout.
The actual mapping is done on 2 places:
- Set to a given screen a type
- Set the type for a given item on the data source:
- On
Manual Feedthis is done onType Mappingfield - On Custom / Provided
Pipes2this is done by the developer of the data source.
- On
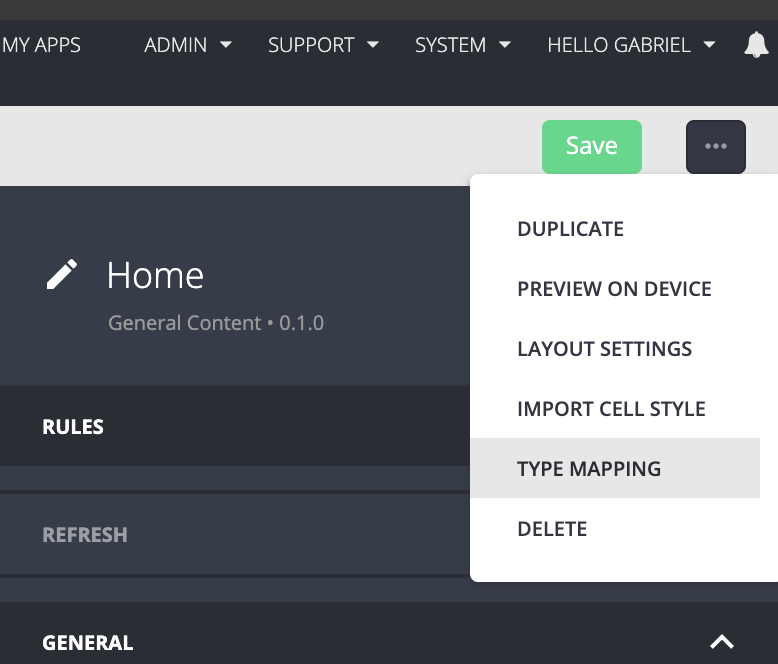
- Click on the layout settings button
- Choose
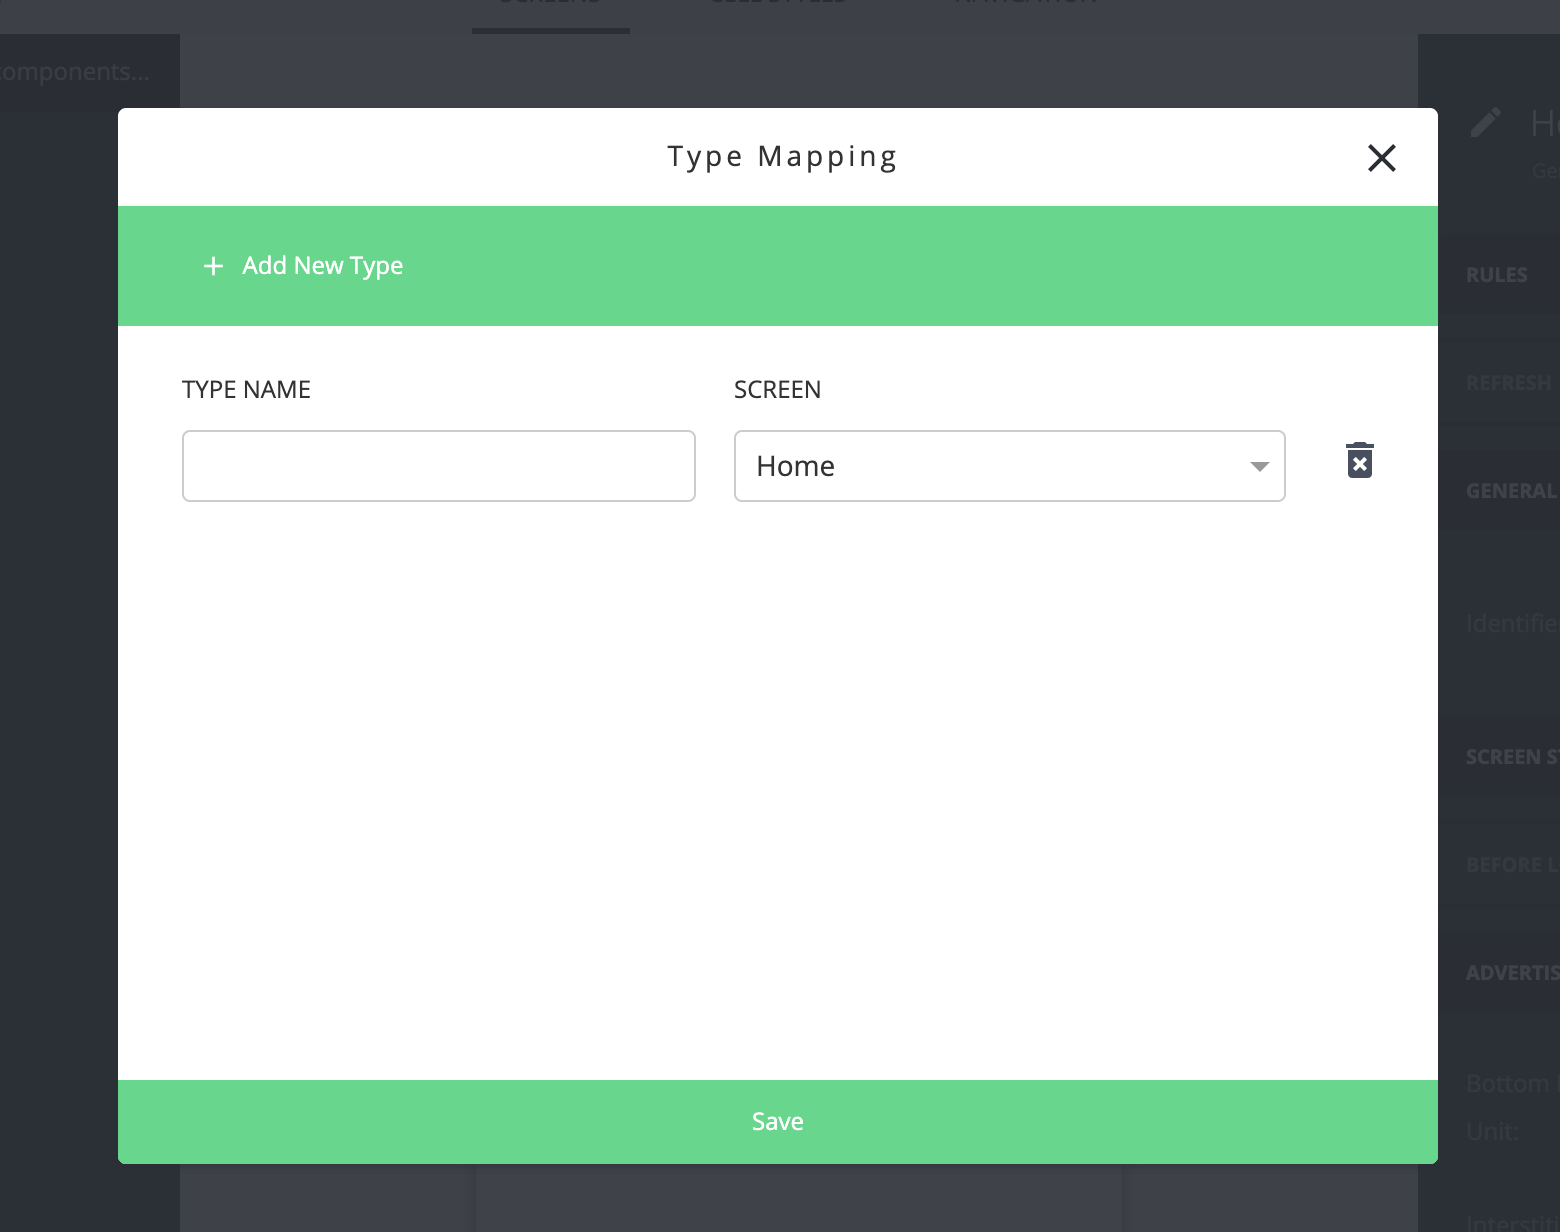
Type Mapping - Click on the
Add New Typebutton and set for each desired screen its corresponding mapping - Now each item on a feed that has the corresponding type will open on the mapped screen you configured.
Screen mapping is used to target specific screens when sending Push notification. Please consult your Customer Success representative on how to do it.
Next Steps
Set up your app icon and splash screen
Add Endpoints and feeds
Coming Soon.
Add / Upgrade plugins
Coming Soon.
Release builds
Coming Soon.